DIY Paper Bag Stars | Simple Seasonal Decor
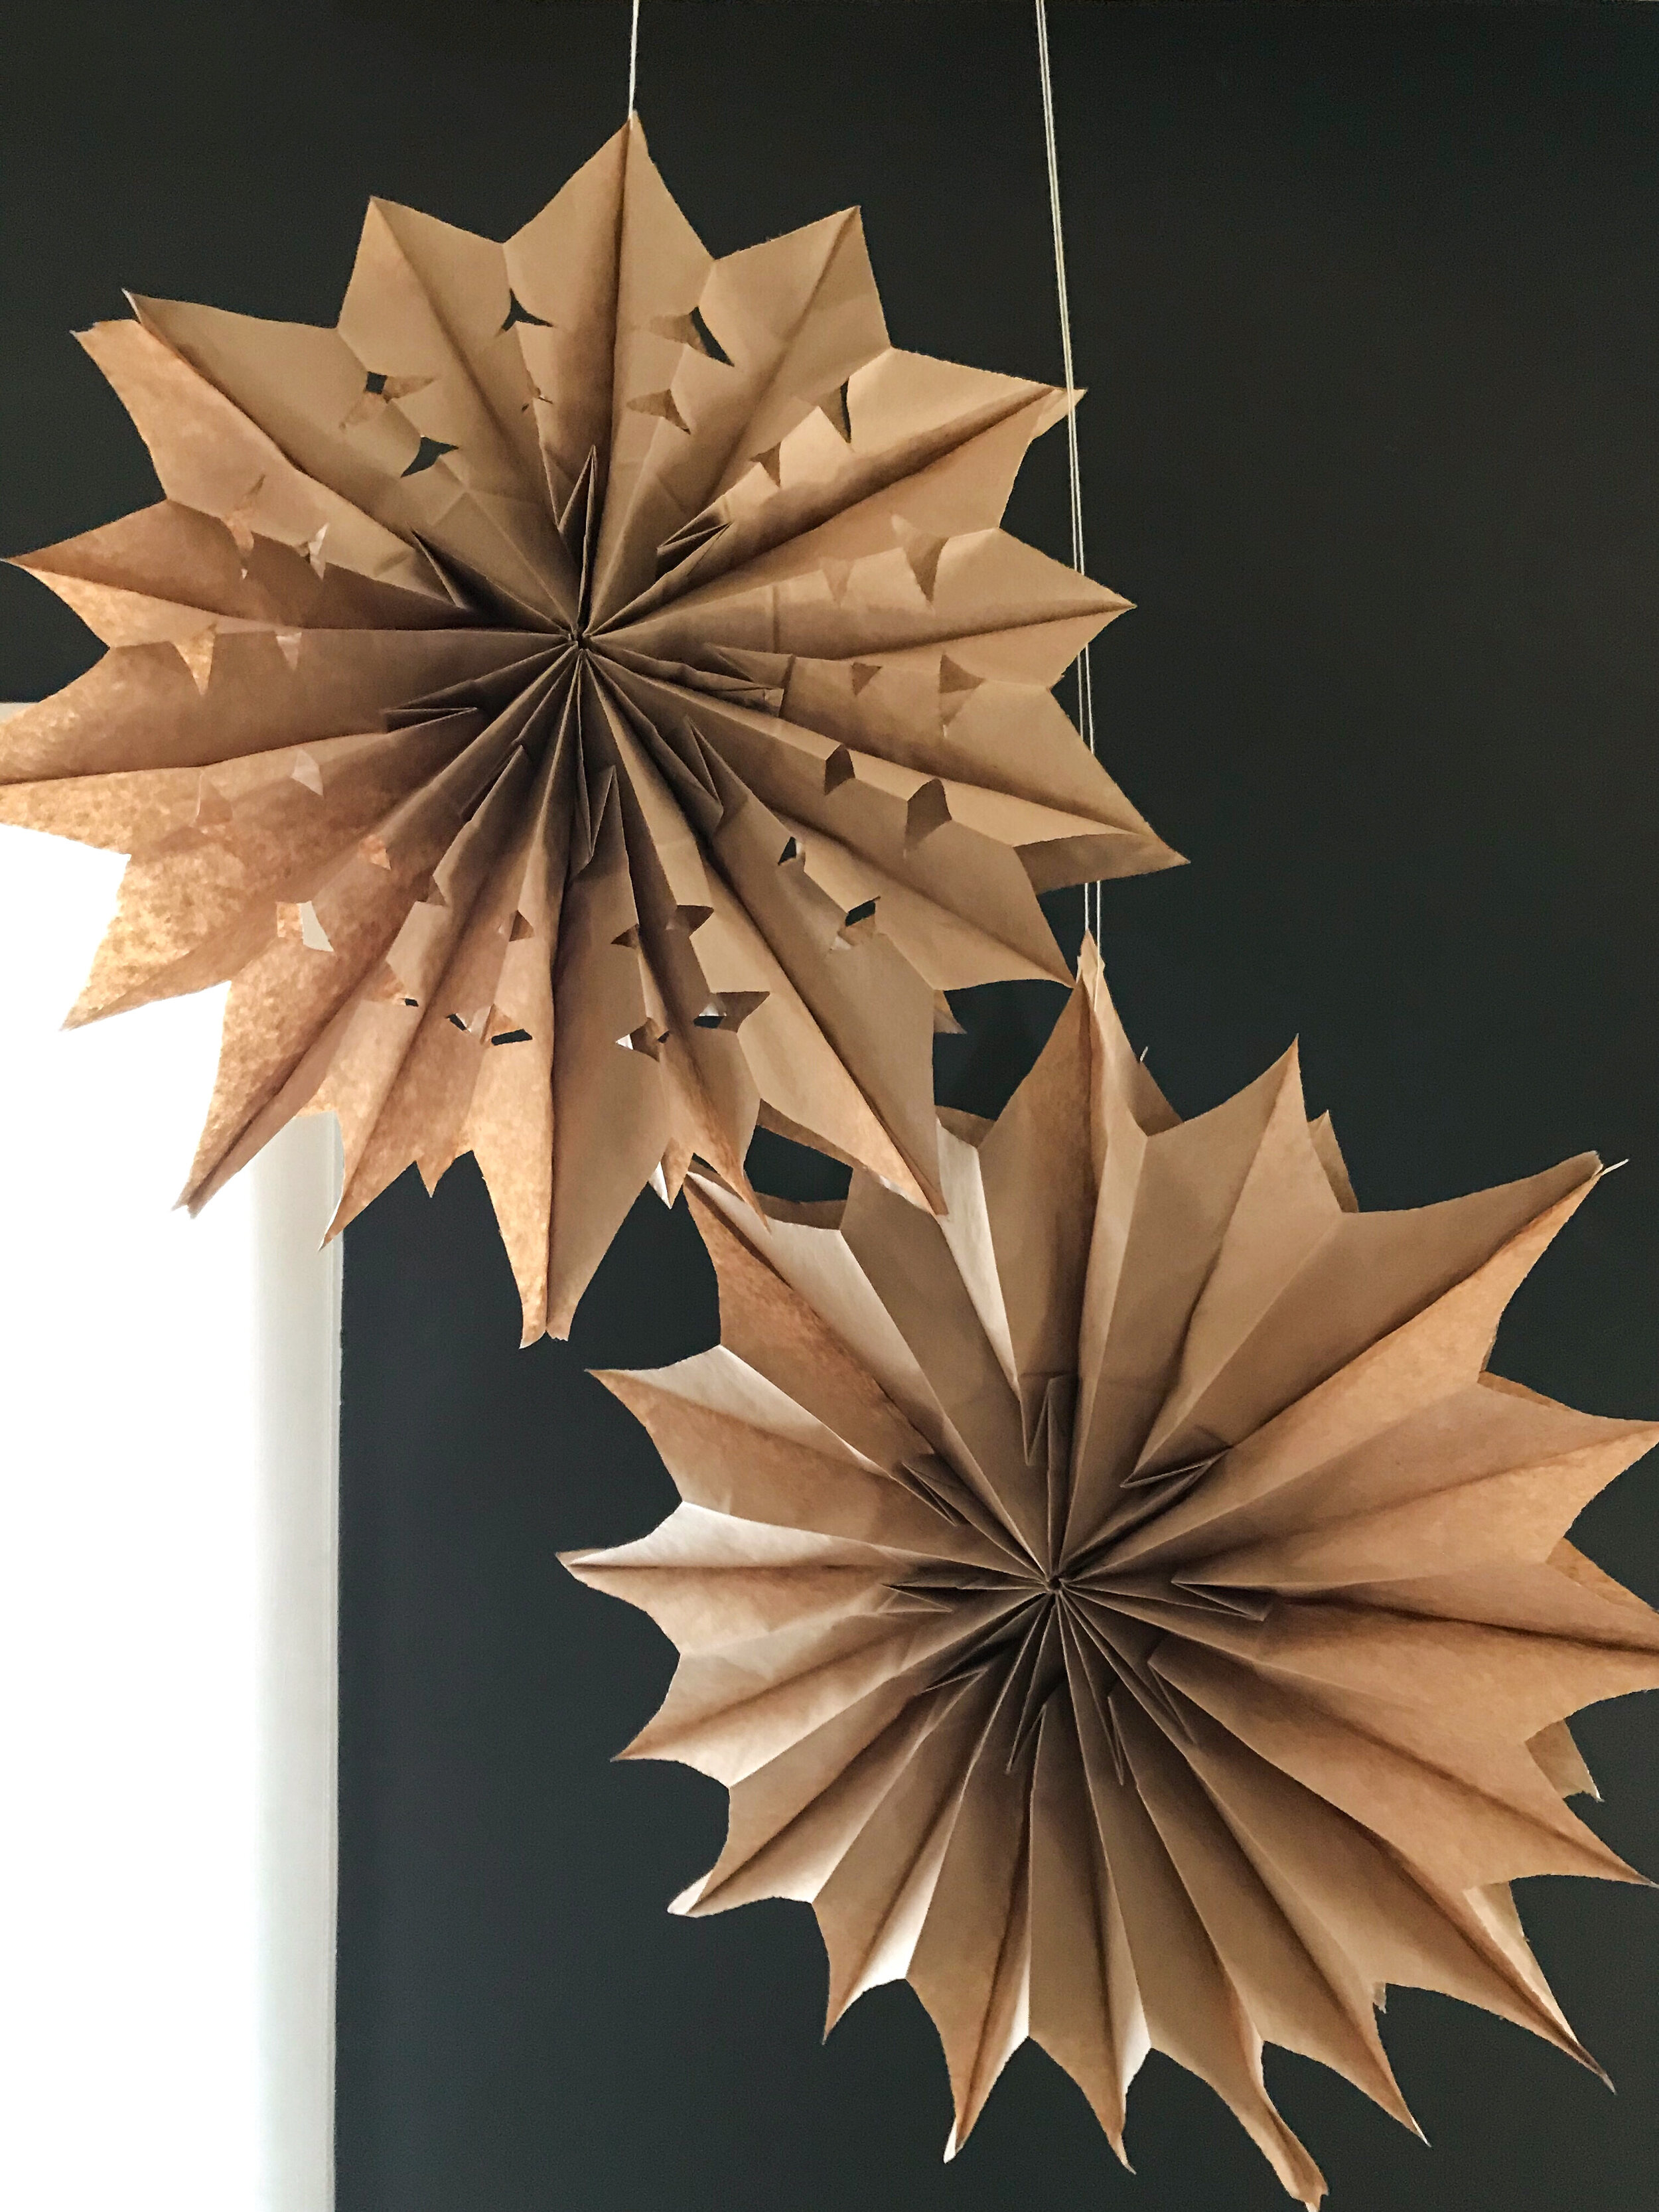
This year, I am doing all of the holiday crafts I’ve always admired but never made time to do before. My favorite so far are these beautiful paper bag stars! I always assumed they were tricky to make, but thanks the @homesweethomestead’s Instagram tutorial (which she said she first learned from @oldjoy) I realized just how simple and easy these are to make yourself. Obviously, this paper star craft has been around for a long time but I wanted to immortalize it here on the blog because of the pure joy this simple decoration is to make. These stars (or some people call them snowflakes) are festive for Christmas but I am fully intending to move them to the playroom come January and leave them up all year long.
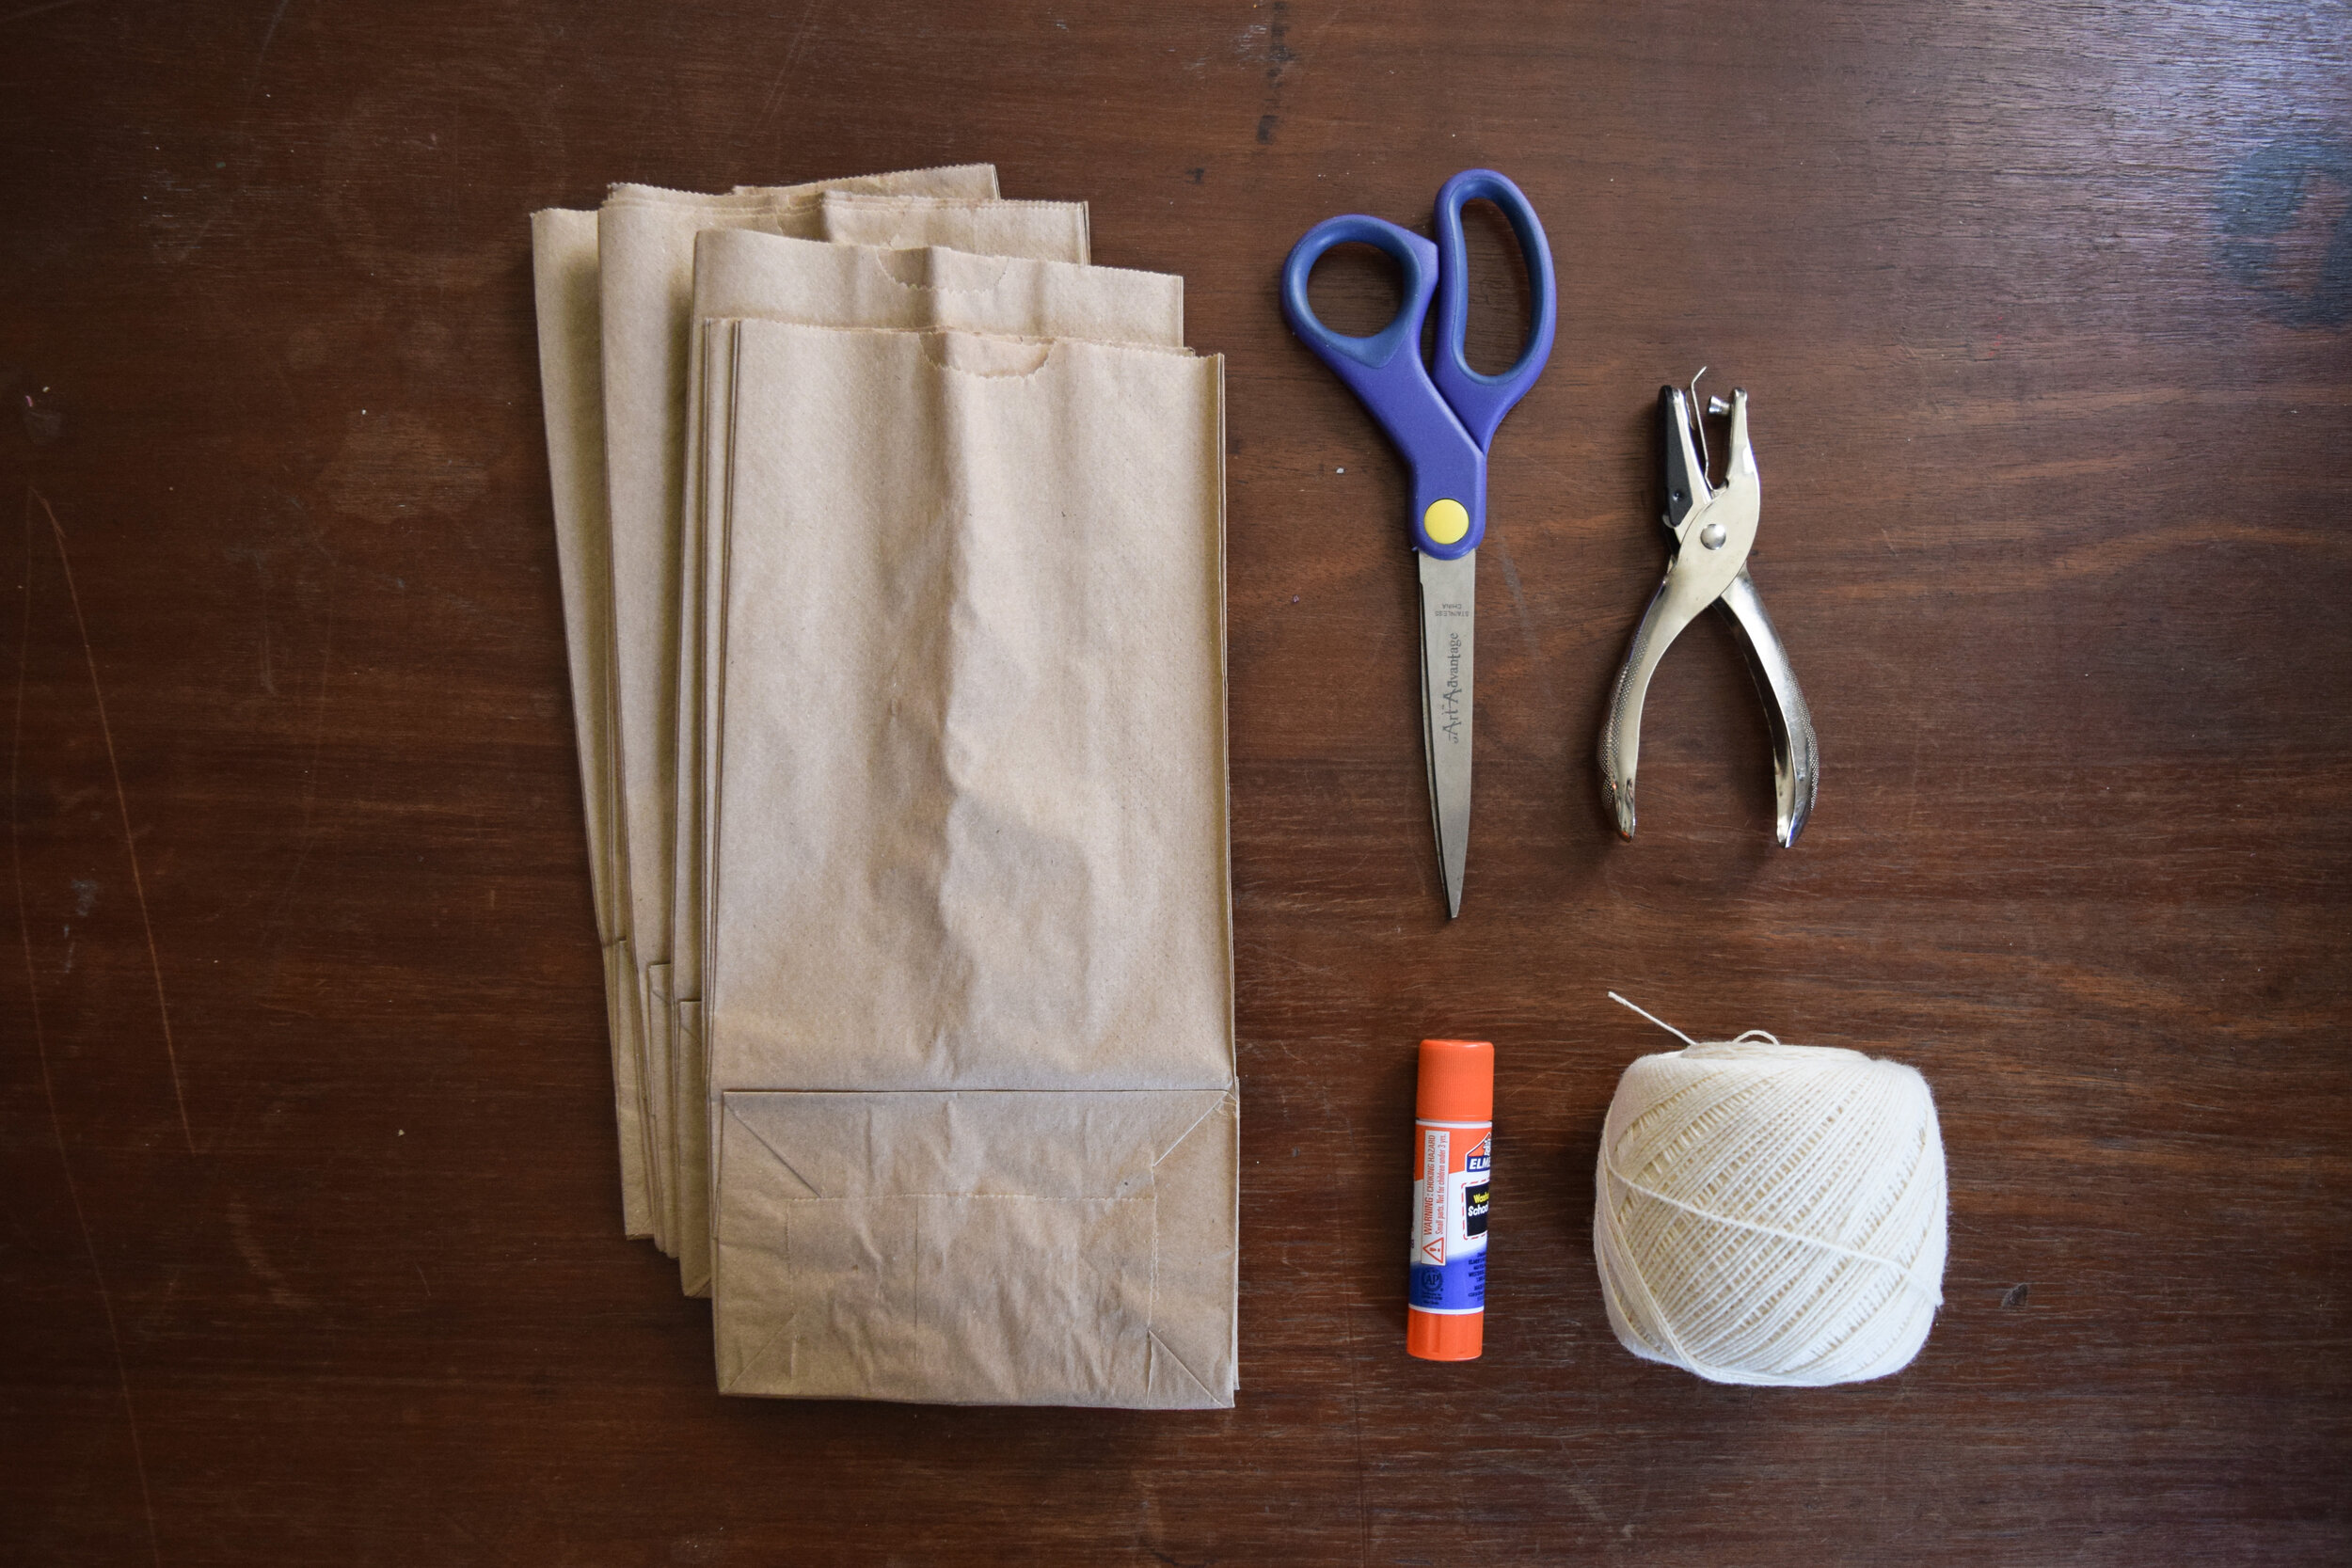
Supplies
Brown paper bags (we bought a pack of 100 for something like $2)
Glue stick (hot glue works but is less kid-friendly)
Scissors
Hole punch (or you could use a needle)
String
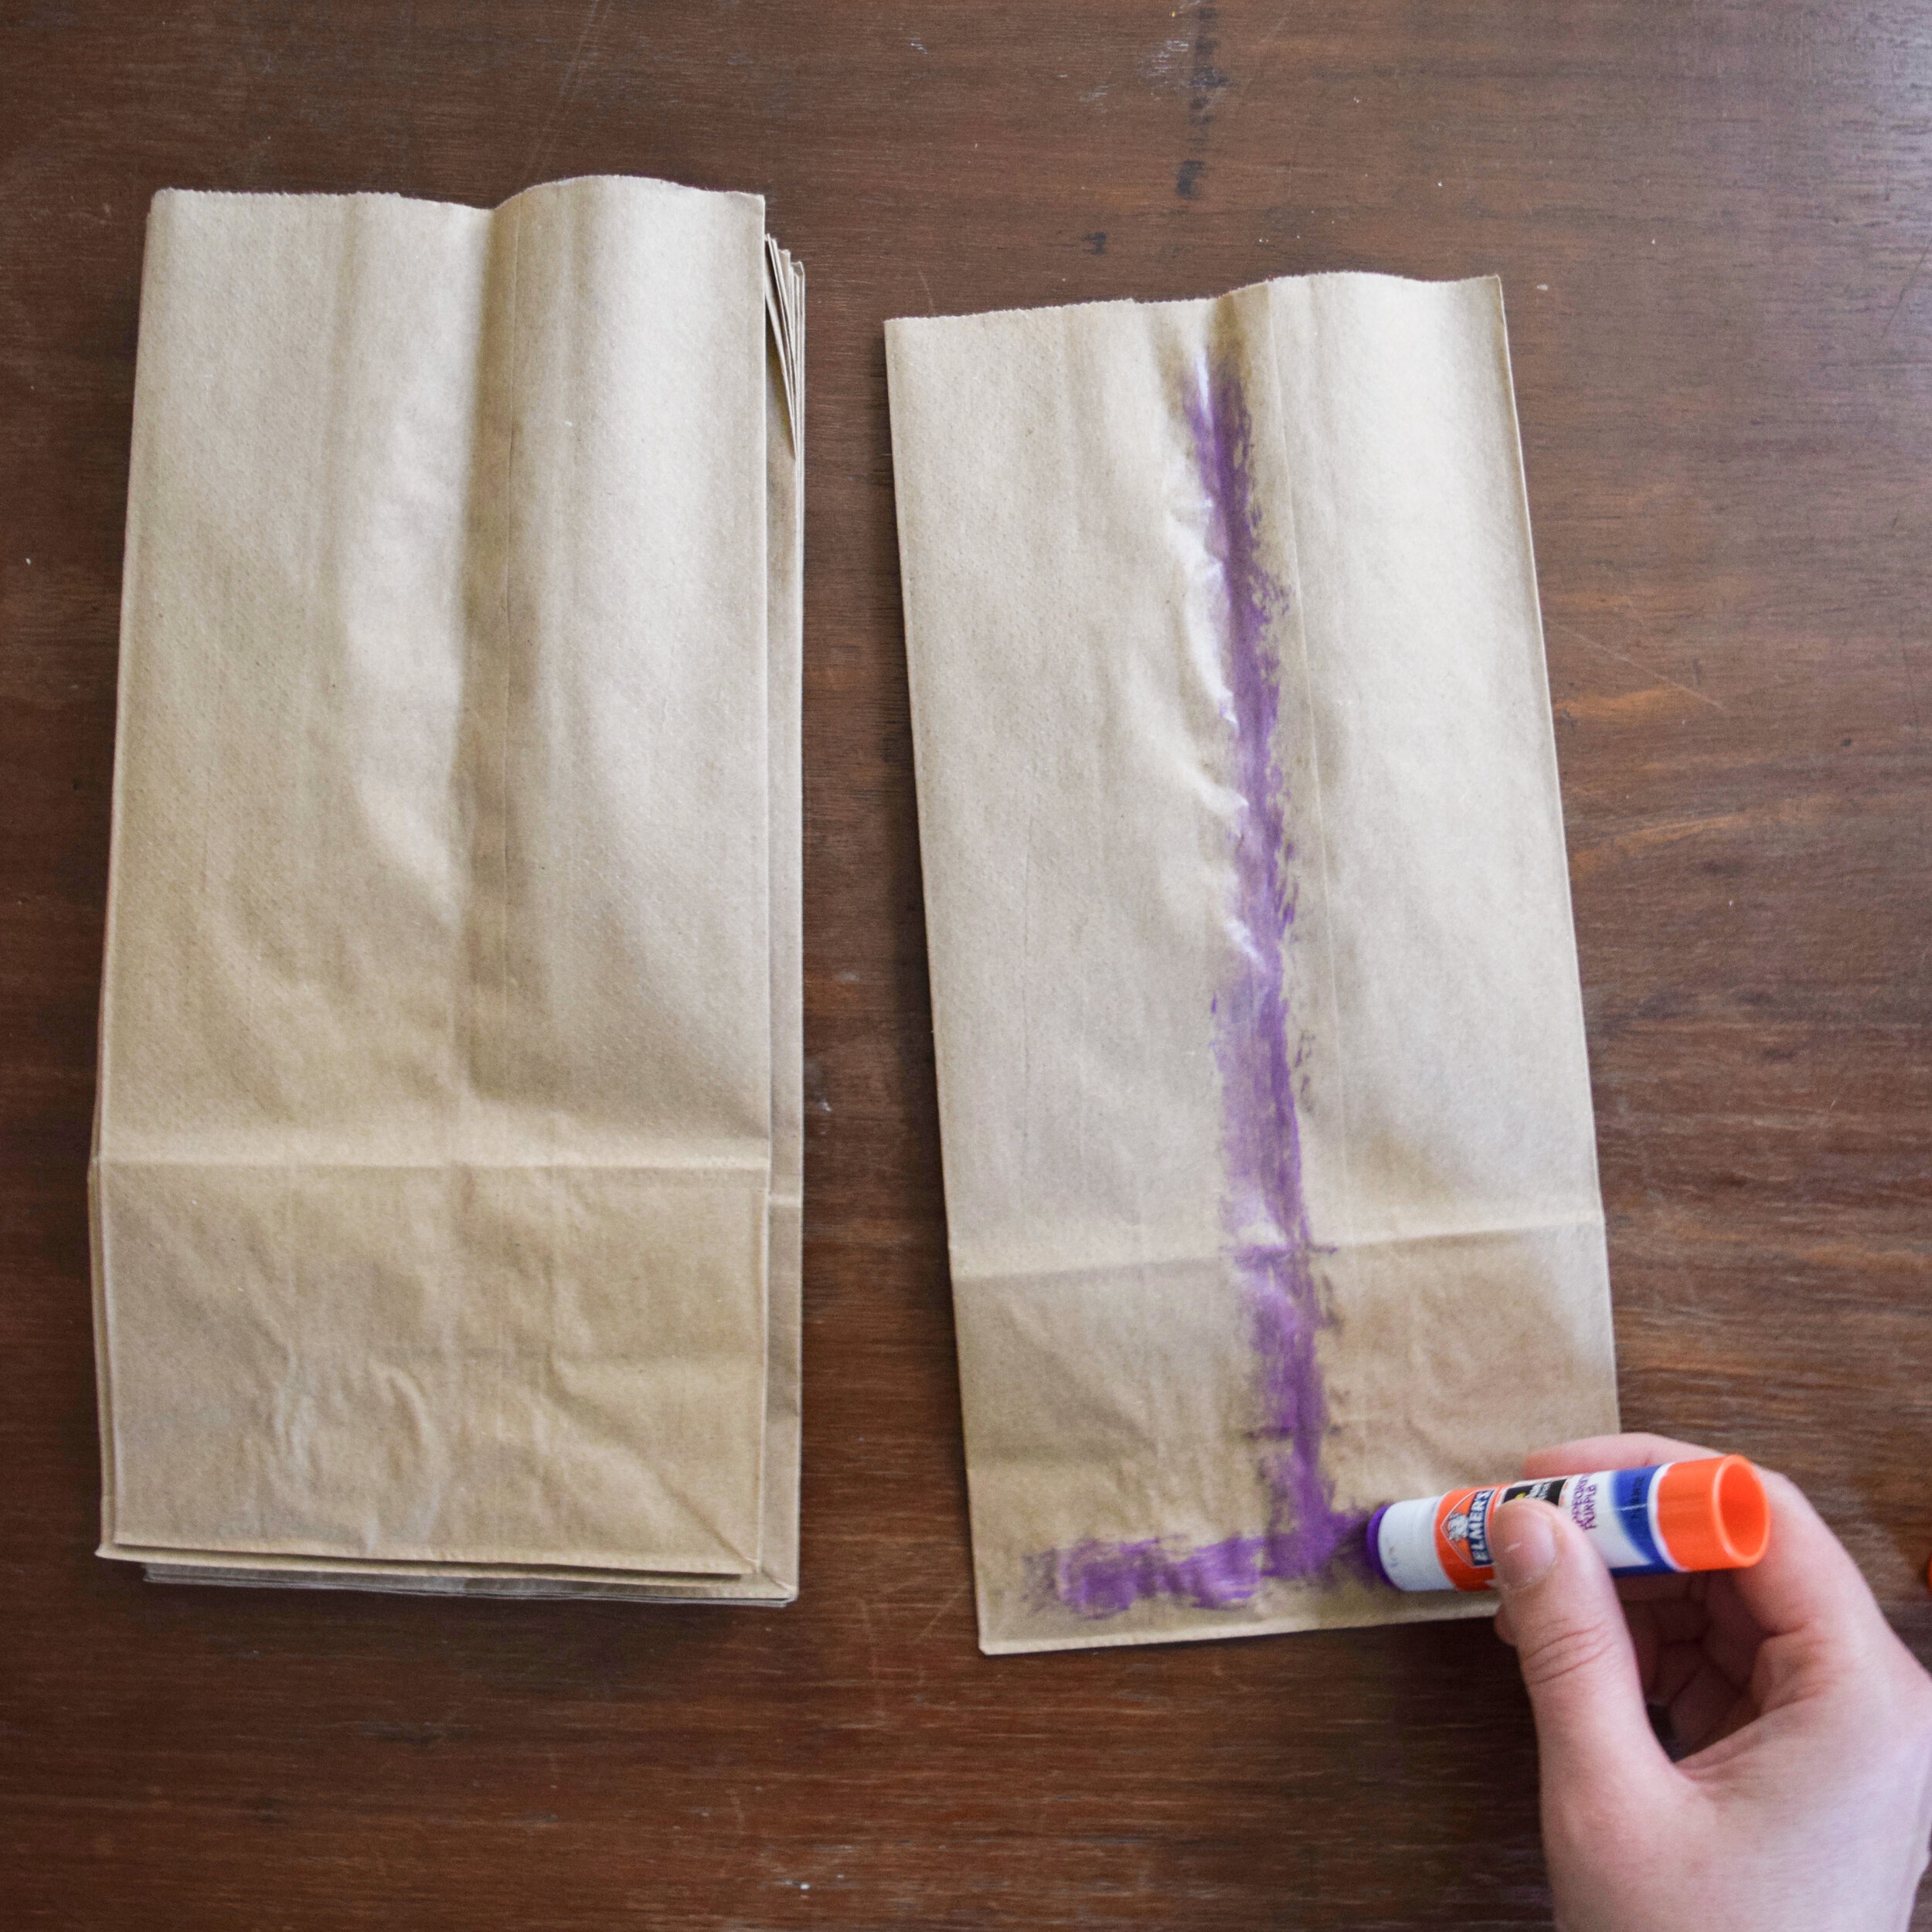
Step 1: With the flat side of your bag facing up and the opening at the top, apply glue to paper bag in an upside down “T” shape. Stack another paper bag on top - again, flat side facing up, opening at top - and press down to make sure glue adheres and repeat until all your bags are glued together. These stars work best if you use 7-12 paper bags for each one. We did a mix of different amounts but tended to like the look of 8, 9 and 10 bags the most. Let the glue dry for a couple minutes before continuing.
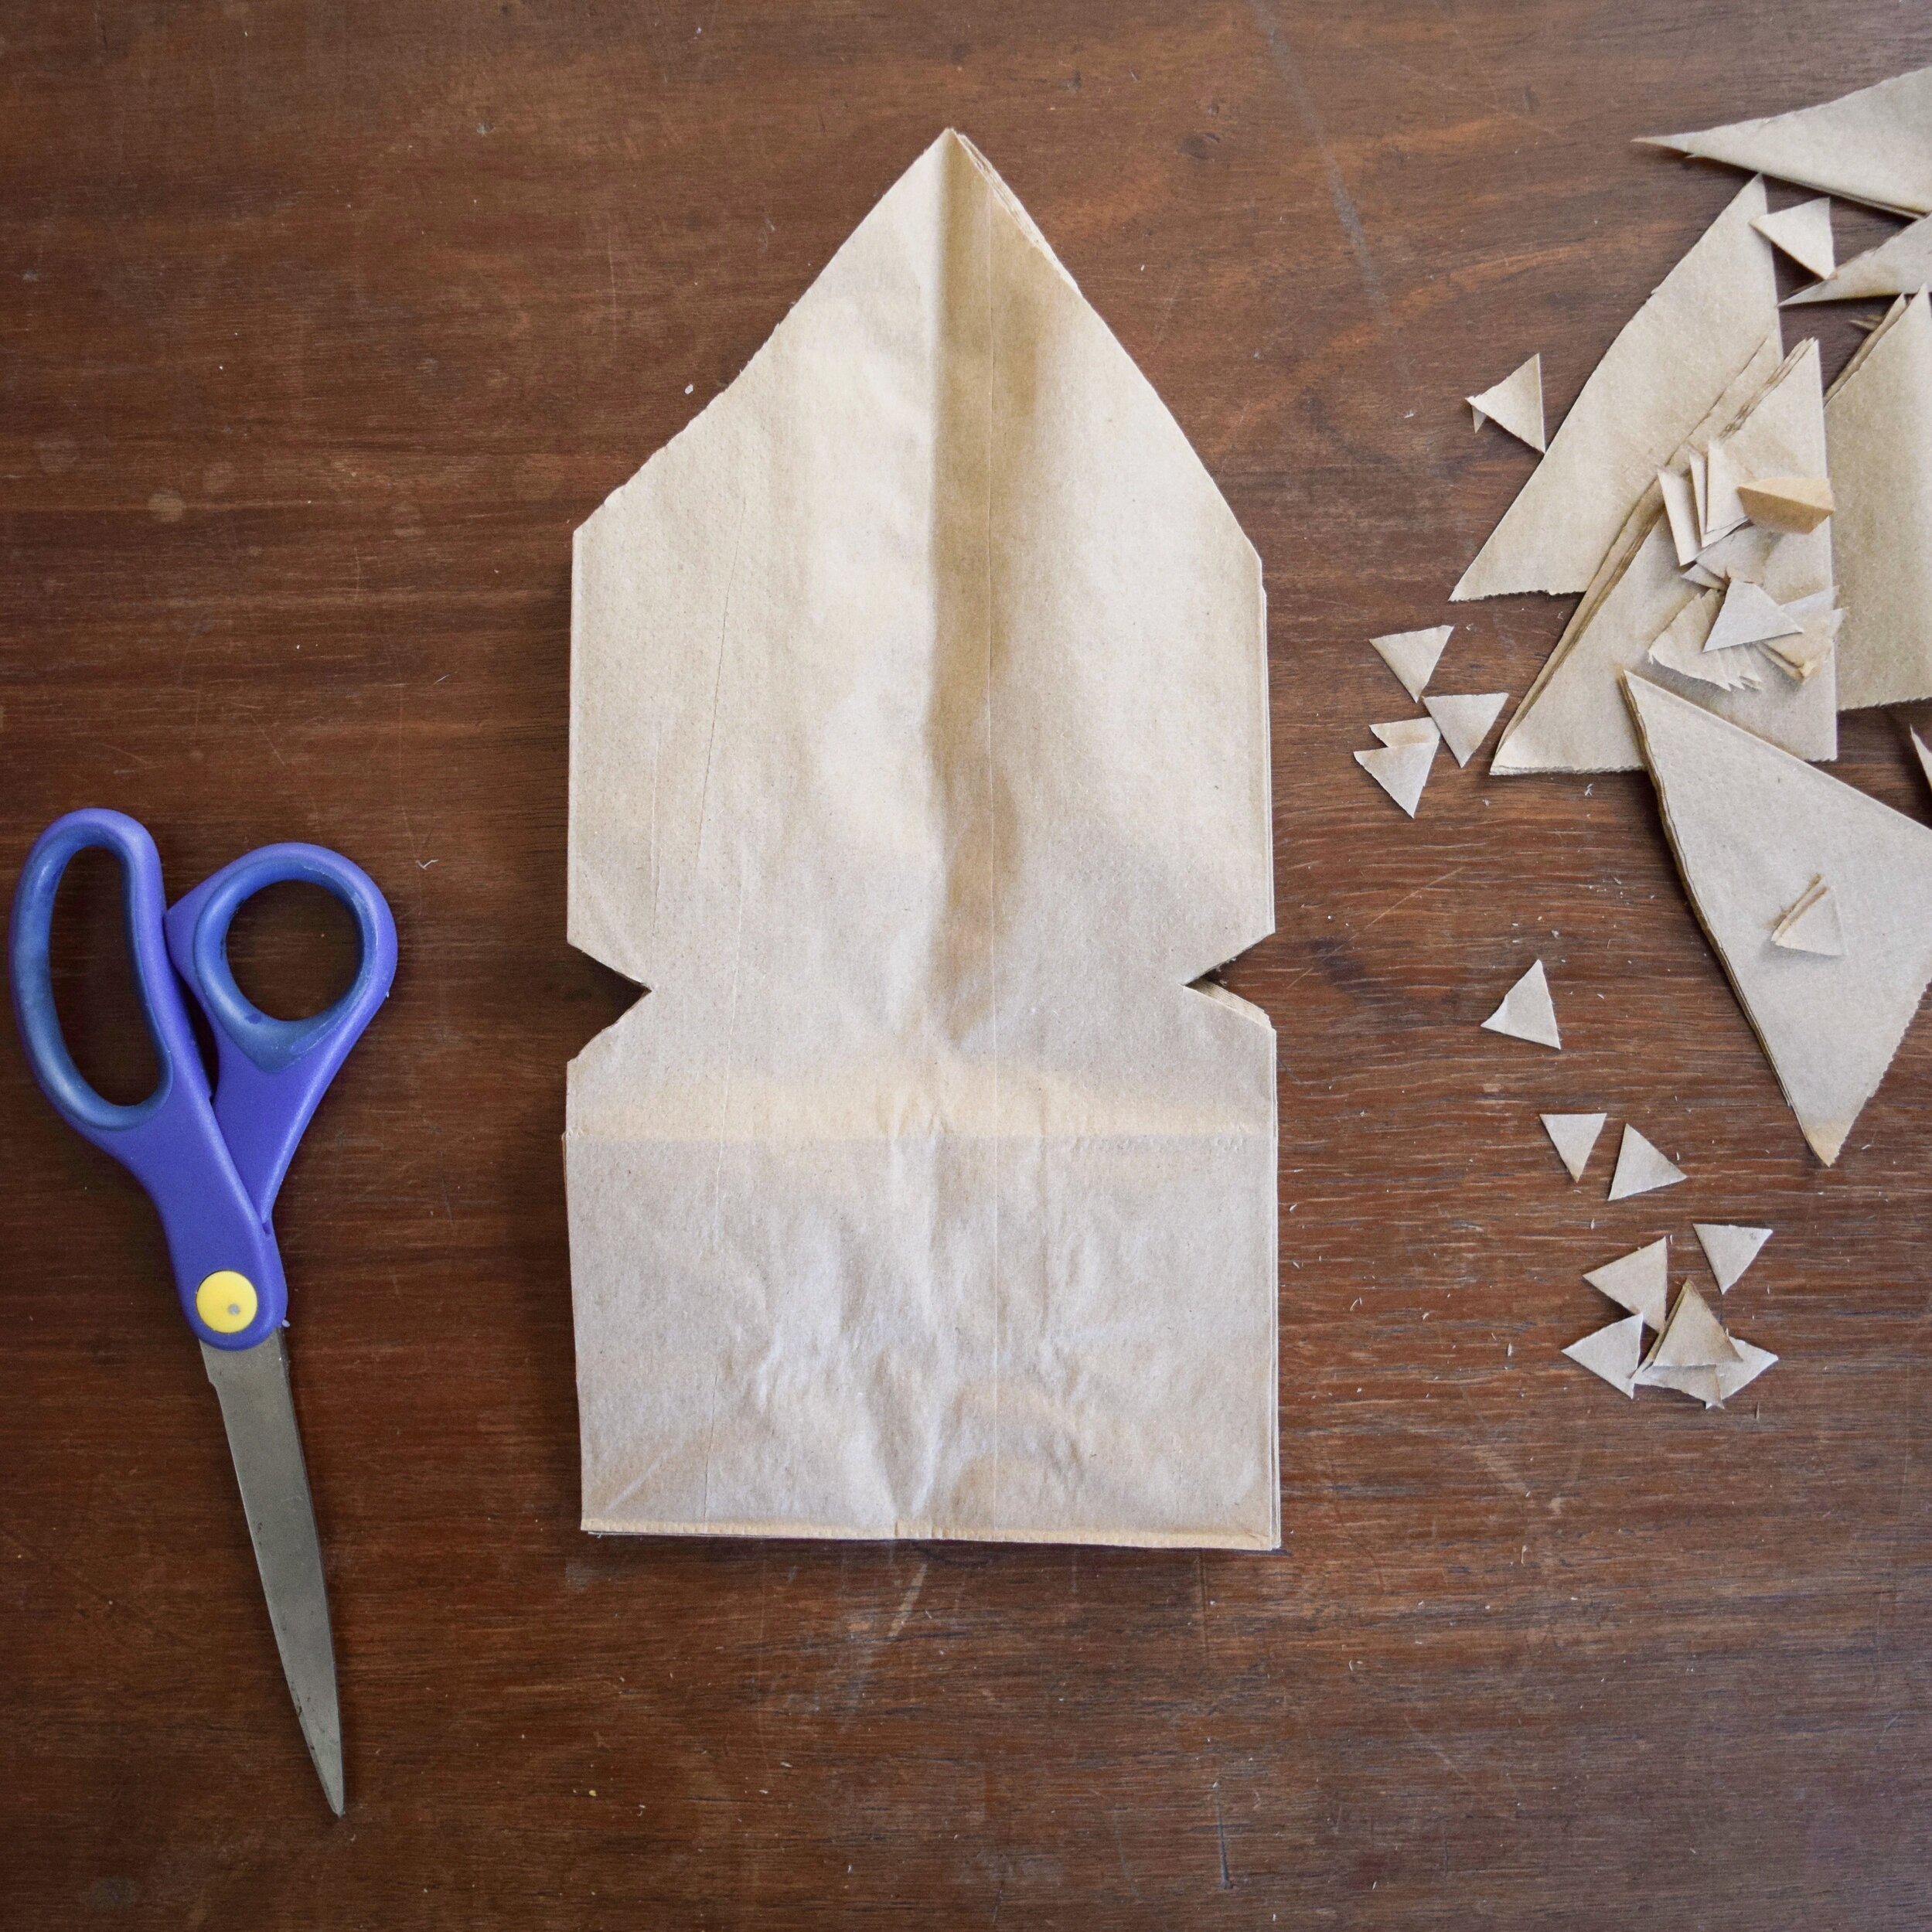
Step 2: Cut the top end of your stacked bags into a point, cutting through all the layers at once. You can use a ruler to draw straight lines if you want, or you can freehand it. As you can tell, I just winged it and my point is neither straight or symmetrical, but I don’t think that takes away from the finished star at all!
Step 3: (Optional) Add other decorative cut outs down the sides of your bag. Triangles are the easiest to cut. We did some with one, some with two and some with three triangle cut-outs. Here’s some paper bag star cutting template ideas if you want to get fancy with your cut-outs!
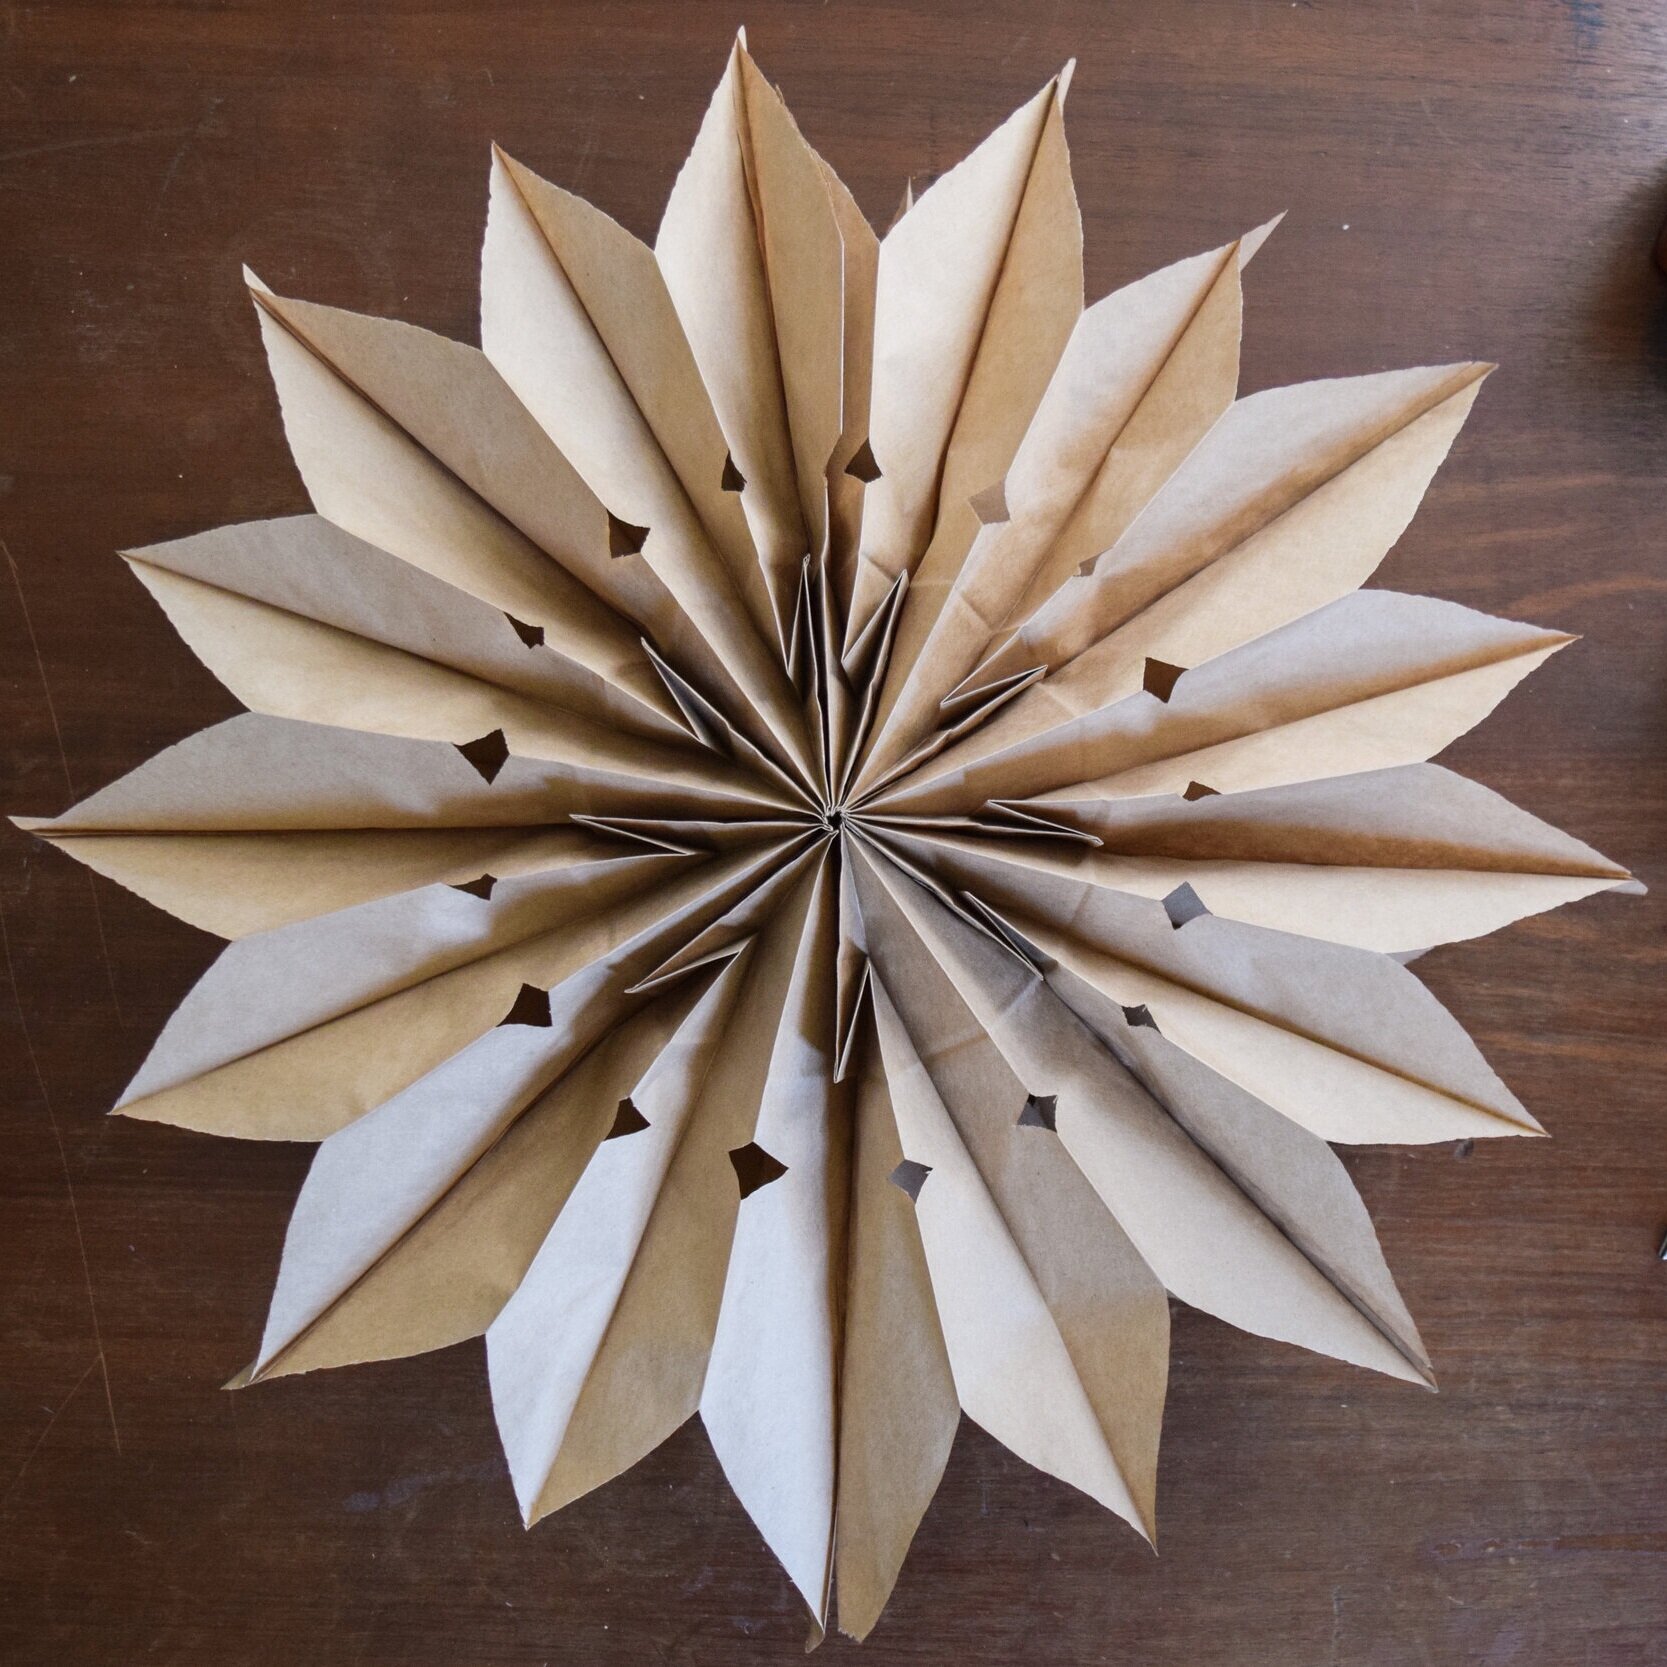
Step 4: Open your star by bringing the front of your top bag down and around to meet the back of your bottom bag and secure with more glue. Ta-da! It’s really that easy.

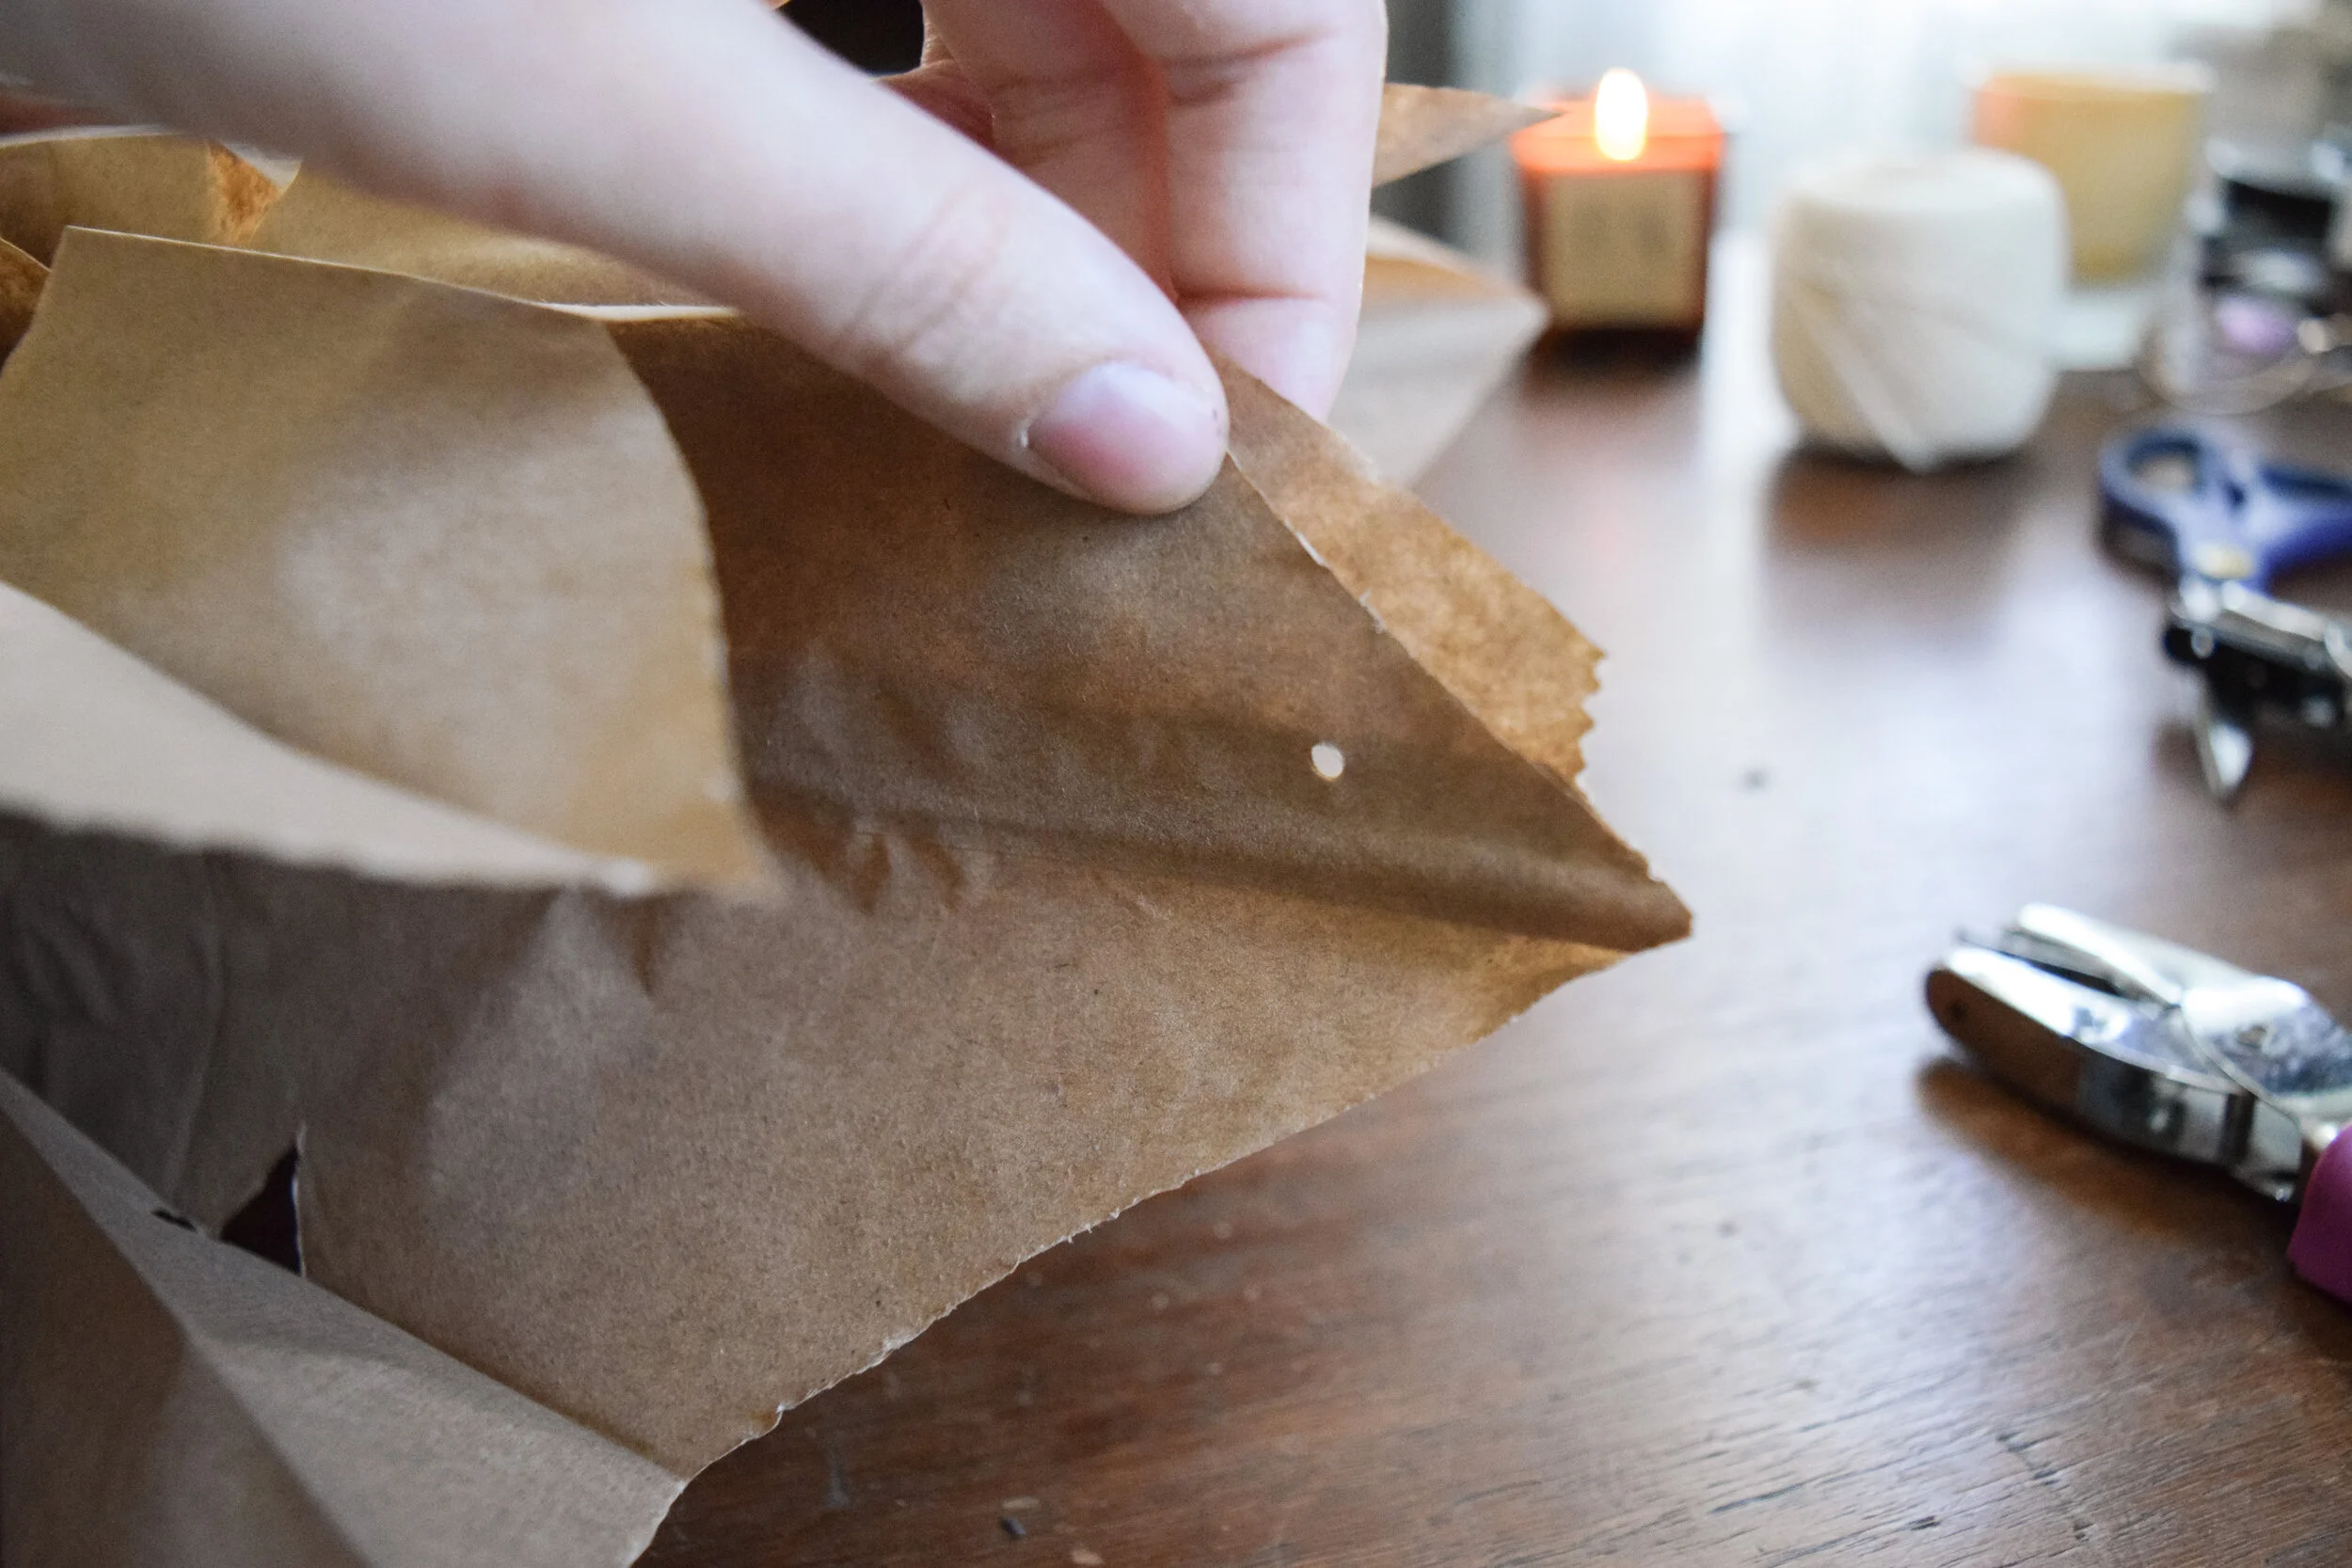
Step 5: To hang, use a hole punch or needle to poke a hole through the sides of your star (shown below) and thread string through. You can use yard, fishing line, whatever you have on hand. We used bakers twine.
I am on a DIY kick lately, I’ve been pinning tons of craft ideas over on Pinterest! Follow me there or connect on Instagram, I’m @steviestorck both places!